🎬 Free Video Converter and Crop Editor Turn Long Videos Into Exactly What You Need
Have you ever received a video that was almost perfect for your project? Maybe it was too long, the wrong shape, or saved in a format that your favorite program did not like. You only needed a few seconds, but getting those seconds out of the original video became a project of its own.
That is where a Video Converter and Crop Editor comes in handy. Instead of opening complicated editing software, you can trim unwanted footage, change the shape of the picture, and convert the finished clip into a format that works for your project.
Whether you are making Facebook Reels, preparing videos for a website, creating YouTube Shorts, or simply converting an old MOV file into MP4, a few basic editing tools can save a surprising amount of time.
Here are seven practical ways to use a free browser-based video converter and crop editor, along with some tips for getting better results.
✂️ 1. Trim Long Videos Without Complicated Editing Software
Imagine receiving a five-minute promotional video when you only need a 12-second section. The rest of the video might be perfectly good, but it does not belong in your project.
Video trimming lets you remove everything before and after the section you want to keep.
For example, suppose your original video runs for three minutes. The part you want begins at 45 seconds and ends at 58 seconds. Set the starting point to 00:00:45 and the ending point to 00:00:58.
Your finished video will contain approximately 13 seconds of footage instead of the entire three-minute recording.
This is useful for:
- Removing long introductions from videos.
- Creating short promotional clips.
- Extracting a scene for a Facebook Reel.
- Keeping only the important part of a demonstration.
- Cutting unwanted footage from personal recordings.
- Preparing shorter clips for another video editor.
You do not need a complicated timeline with dozens of editing tracks when all you want is a simple beginning and ending point.
🔄 2. Convert MOV, MP4, AVI, MKV and Other Video Formats
Video files come in several different formats. Some are more convenient for websites and social media, while others are commonly used by cameras, editing programs, and production companies.
A video converter helps you create a new file in the format you actually need.
Common video file formats include:
- MOV: Frequently associated with Apple devices, cameras, and professional video production.
- MP4: A widely supported format used for websites, social media, and everyday video playback.
- WebM: A format designed for web-based video.
- AVI: An older video container still found in many collections.
- MKV: A flexible video container that can hold multiple audio tracks and other information.
- M4V: A video container commonly associated with Apple software.
- MPEG and MPG: Older video formats that are still encountered in existing video collections.
For most everyday projects, MP4 is a practical choice because it is widely supported by video players, websites, and social media services.
WebM is another useful option, particularly for web-based video projects.
One important detail: a video file extension does not tell the whole story. A MOV, AVI, or MKV file can contain different video and audio codecs. That means compatibility depends on what is actually inside the file, not simply the letters after its name.
For example, a converter may handle one MOV file perfectly while another MOV file uses a codec that is not supported.
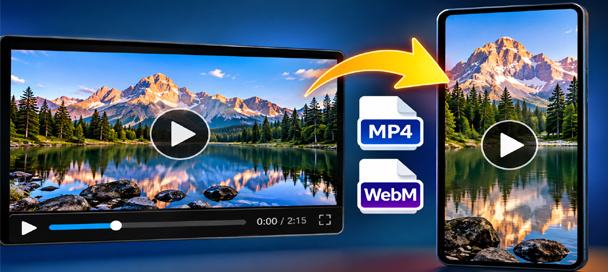
📱 3. Turn Landscape Videos Into Vertical Facebook Reels
Traditional widescreen video usually uses a 16:9 aspect ratio. That is the familiar rectangular picture you see on televisions, computer monitors, and many YouTube videos.
Vertical video uses a different shape.
A 9:16 video is tall instead of wide, making it a popular format for Facebook Reels, YouTube Shorts, TikTok, and other short-form video platforms.
The problem appears when your original video was recorded horizontally.
Simply squeezing a widescreen video into a vertical frame would distort the picture. People would look unnaturally thin, objects would appear stretched, and the finished video would look terrible.
The better approach is to crop the original picture.
A video crop editor can select a vertical section from the widescreen source while maintaining the correct proportions.
For example, imagine a landscape video showing three people standing across a room. A centered vertical crop might show only the person in the middle.
That may be exactly what you want. But if the important person is standing on the left, you need a way to change which part of the original picture remains visible.
That brings us to the next feature.
🖼️ 4. Choose Which Part of the Video Stays in the Picture
Cropping a video is not just about changing its shape. It is also about deciding what the viewer will see.
When converting a landscape video into a vertical or square format, parts of the original picture may disappear.
That can become a problem when the important action is not in the center of the frame.
A useful video crop editor offers several positioning choices.
- Center Crop: Keeps the middle portion of the picture.
- Left or Top Crop: Favors the left or upper portion of the original video.
- Right or Bottom Crop: Favors the right or lower portion of the picture.
- Fit Entire Video: Keeps the complete picture visible, adding black space when the original and output shapes do not match.
There is no single crop position that works for every video.
If the subject is centered, a center crop may look great. If the action takes place near the edge of the picture, another position may work better.
That is why an output preview is valuable. You can check the framing before spending time converting the entire clip.
Keep in mind that a fixed crop position does not automatically follow a moving person or object. If the subject moves across a wide scene, you may need to choose a different section or use a more advanced video editor.
🎞️ 5. Make Several Short Clips From One Long Video
Here is a situation that can become frustrating very quickly.
You have a three-minute video containing four different scenes you want to use. Each scene is only five or ten seconds long.
You make the first clip, download it, and then discover that your editing program wants you to load the entire original video again before making the second clip.
Now imagine repeating that process four times with a large video file.
A better workflow keeps the original video available while you make additional clips.
Here is an example:
- Load the original three-minute video.
- Select the first useful section.
- Convert and download Clip 1.
- Change the starting and ending points.
- Convert and download Clip 2.
- Repeat until you have all the clips you need.
Instead of creating one long video containing several unrelated scenes, you end up with individual clips that can be arranged however you want.
This is especially useful when making a Reel from several short scenes, photographs, and other material.
You can prepare the video clips first, then move them into your main video-making tool when you are ready to assemble the finished project.
🔊 6. Remove Unwanted Audio Before Using a Video Clip
Sometimes the picture is exactly what you want, but the original audio is not.
Maybe the video contains background conversations, unwanted music, camera noise, or narration that does not fit your new project.
If you plan to add your own music or narration later, there may be no reason to keep the original audio track.
A video converter with an audio option lets you choose whether the finished video should include sound.
For example, you might be making a short Reel that combines several video clips with background music. If each source clip contains its own audio, the result can become a confusing mixture of different sounds.
Removing the original audio gives you a clean video clip that is ready for your new soundtrack.
On the other hand, if the clip contains important dialogue or sound effects, leave the audio enabled.
The choice depends on how you plan to use the finished video.
⚙️ 7. Choose Video Quality Without Getting Lost in Technical Settings
Video quality and file size are closely connected.
Higher-quality video generally requires more data, while stronger compression can reduce file size at the expense of picture detail.
Professional video software may offer dozens of settings for codecs, bitrates, frame rates, compression profiles, and other technical options.
Those controls can be useful, but they are unnecessary for many everyday jobs.
A simpler approach is to offer a few quality choices.
- High Quality: A good choice when preserving picture detail is important.
- Medium Quality: A practical balance for many everyday projects.
- Small File: Useful when reducing file size matters more than preserving every detail.
Remember that converting a video cannot restore detail that was missing from the original recording.
If the source is blurry or heavily compressed, choosing High Quality will not magically turn it into a sharp professional recording.
It can, however, help avoid unnecessary additional quality loss during conversion.
🎥 How to Use the Free Video Converter & Crop Editor
Now that you know what these features do, putting them together is straightforward.
The free Video Converter & Crop Editor at Mike’s Helpers combines trimming, format conversion, cropping, previewing, and audio controls in one browser-based tool.
Here is how to use it:
- Open the free Video Converter & Crop Editor.
- Click Choose Video and select your original video file.
- Use the video player to find the section you want.
- Set the Start and End points.
- Choose MP4 or WebM as the output format.
- Select Original, 16:9, 9:16, or 1:1 as the output shape.
- Choose the crop position that best frames your video.
- Select High, Medium, or Small File quality.
- Decide whether to keep the original audio.
- Click Convert Video.
- Wait for the conversion to finish.
- Download your finished video.
If you need another clip from the same source, change the Start and End points and convert again.
You do not have to select the original video again.
Try the free tool: Free Video Converter & Crop Editor
🔒 Why Browser-Based Video Conversion Can Be Useful
Many online video converters work by having you upload your video to a remote server. The server processes the file and provides a download when the conversion is finished.
That approach can be convenient, but uploading a large video can take time. It also means transferring the original file to another service.
A browser-based converter takes a different approach.
The video processing happens on your own device rather than uploading the original video to a conversion server.
This can be especially useful when you are working with large promotional videos, personal recordings, or other material you would rather keep on your computer.
There is a tradeoff, however.
Because your browser is doing the processing, conversion speed depends on your computer, available memory, video length, and selected output settings.
A short clip may be relatively quick to process, while a large high-resolution video can require considerably more time.
For best results, keep the browser tab open while the conversion is running.
📺 Combine Your Finished Clips Into a Complete Reel
Trimming and converting video is often only the first part of a larger project.
Once you have created several short clips, you may want to combine them with photographs, narration, music, and transitions.
For example, imagine making a 30-second Reel to promote a movie, product, event, or website.
You might start with a photograph, follow it with a short video clip, add another photograph, and finish with a second video clip.
Instead of forcing the entire project into one complicated editing session, you can prepare the individual video clips first.
Then use the Video Converter & Crop Editor for any additional trimming or cropping before assembling your final video.
Mike’s Helpers also offers a Free Image-to-Video Maker that can combine photographs and compatible video clips into a finished video project.
Working with shorter, prepared clips makes it easier to control the timing and order of your finished Reel.
💡 Final Thoughts: Sometimes Simple Video Editing Is All You Need
Not every video project requires expensive software, complicated timelines, or hours of editing.
Sometimes you simply need to cut 10 seconds from a longer recording, convert a MOV into MP4, make a landscape video vertical, or remove unwanted audio.
Those small jobs should not require learning an entire professional editing program.
A free Video Converter and Crop Editor can handle many of these everyday tasks while leaving the more complicated editing work to specialized software when necessary.
And if you are making several clips from the same source video, being able to keep that original loaded can save even more time.
Ready to try it? Visit the Free Video Converter & Crop Editor at Mike’s Helpers and start creating the clips you actually need.