How to Back Up a Website: 9 Simple Steps Before Something Goes Wrong
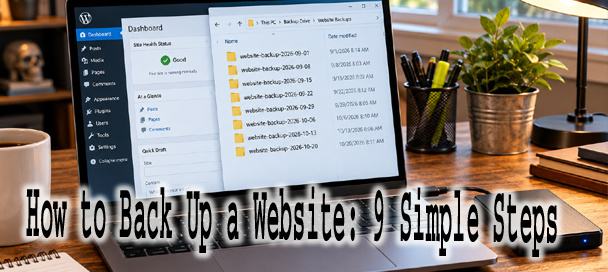
How to back up a website is a question most site owners only search for after something has already gone wrong. Often they are staring at an error message they never expected to see. A failed update, a hacked plugin, or a server crash can erase months or years of work in minutes. Learning how to back up a website properly, well before disaster strikes, is the single easiest way to protect that work over time. This guide walks through nine simple steps any website owner can follow. It also covers the mistakes that tend to undo backup plans that look solid on paper.
Why Every Website Needs a Backup
A website backup exists to solve everyday problems, not just rare catastrophes. A bad plugin update can break a site’s entire layout or crash it entirely within seconds of clicking update. A typo in a settings file, a misconfigured redirect, or an accidentally deleted page can happen to even careful, experienced site owners. Malware infections spread quietly and sometimes go completely unnoticed for weeks before anyone realizes the real damage. Server hardware fails, hosting accounts get suspended by mistake, and human error remains the most common cause of data loss on any platform. It is far more common than any hack.
A recent, working backup turns each of these stressful situations from a crisis into a minor inconvenience. There is no need to rebuild a site from scratch or remember exactly how everything was configured. A site owner can simply restore the last good version and move on.
Step 1: Find Out What Your Host Already Backs Up
Most web hosts already run some form of automatic backup, and checking exactly what that includes is the logical first step. This step often gets skipped entirely, since many site owners simply assume the host has everything covered without ever confirming the details. Retention periods vary considerably between hosts, and many only keep backups for a window of seven to thirty days before older copies are automatically deleted. If a problem goes unnoticed past that window, the useful backup may already be gone.
Host backups also vary in what they actually capture. Some include the full database and every file, while others cover only specific folders or skip certain file types entirely. Restore options matter just as much as backup frequency. Some hosts require a support ticket and a waiting period to restore anything, while others offer a simple one click restore. Understanding these details before an emergency happens saves real time and stress later. A quick email or chat message to hosting support usually clears up any confusion. Just ask directly what gets backed up and how restores actually work.
Free Image Metadata Remover, Viewer & Converte
Step 2: Back Up the Website Files
A website’s files make up everything that is not stored in the database. This includes the theme, every installed plugin, custom scripts, and the uploads folder. Backing these up requires actually logging in and downloading them, not just knowing they exist.
Many web hosts use cPanel, which includes File Manager, a fast way to grab a full copy of the files.
- Log into cPanel using the address and login details provided by the host.
- Find and click the File Manager icon, usually listed under the Files section.
- Locate the folder holding the website. This is often public_html for a primary domain, though addon domains and some hosting setups use a different folder.
- From the parent directory, select that folder, or select the files and folders inside it, depending on how the host has things organized.
- Right click the selection and choose Compress from the menu that appears.
- Choose Zip Archive as the format, then click Compress Files to confirm.
- Wait for the compression to finish, then close that confirmation window.
- A new zip file will appear in the same location.
- Right click that zip file and select Download to save it to a local computer.
Anyone without cPanel access can use an FTP or SFTP program instead, such as FileZilla. Enter the host, username, password, and port supplied by the web host. Connect, then locate the website’s root folder on the remote side of the program. Select every file and folder inside it, then drag them to a folder on the local computer. This method takes longer than a single zip download but works with most hosting setups that provide FTP or SFTP access.
Some hosting companies provide JetBackup, a tool that can back up the website files, database, or both, and can also restore a site. If JetBackup is already installed by the host, check its dashboard before installing another backup plugin.
Another option is a WordPress backup plugin such as UpdraftPlus, installed from the Plugins menu inside the WordPress dashboard. Once activated, the Backup Now option can create both the file and database backups without manually downloading either one. Whichever method is used, make sure the backup includes both the website files and the database.
Step 3: Back Up the Database
The database holds a different, equally important category of information. Every post, every page, every comment, and nearly every setting lives inside the database rather than in any individual file. A files only backup with no matching database produces an empty shell of a website.
phpMyAdmin is the standard tool for exporting a database, and it comes included with almost every cPanel hosting account.
- Log into cPanel, then find the Databases section on the main screen.
- Click the phpMyAdmin icon to open the tool in a new tab.
- A list of databases will appear in the left sidebar.
- Click the name of the database connected to the website, usually a name resembling the site’s domain.
- Click the Export tab near the top of the page.
- Leave the export method set to Quick and the format set to SQL, since these defaults work correctly for almost every restore situation.
- Click the Go button at the bottom of the screen.
- The browser will download a single SQL file containing the entire database.
Save this file somewhere clearly labeled, ideally right alongside the zipped website files from Step 2. Both pieces together, the files and the database, form one complete, restorable backup. Neither one alone is enough to bring a website back if something goes wrong.
Step 4: Keep a Copy Away From Your Web Host
Relying only on a copy stored with the same web host creates a single point of failure. That defeats much of the purpose of backing up in the first place. A suspended account, a compromised login, or a simple server failure could strike at any time. Both the live website and any backup on the same infrastructure could disappear together.
Keeping at least one additional copy somewhere entirely separate solves this problem directly. A local computer, an external hard drive, or a cloud storage service like Google Drive, Dropbox, or Amazon S3 all work well for this purpose. The specific storage choice matters less than the simple fact that it lives on infrastructure completely unconnected to the web host.
Free Image Compressor: Shrink JPG, PNG & WebP Without Losing Quality
Step 5: Use the 3-2-1 Backup Rule
The 3-2-1 backup rule offers a memorable framework for organizing all of this into a coherent strategy. The rule calls for three total copies of the website’s data. Those copies should sit across two different types of storage media, with at least one kept entirely offsite. Photographer Peter Krogh is generally credited with popularizing this approach for protecting digital files. It has since become a standard recommendation across nearly every corner of data protection, websites included.
Applied to a typical website, the live site itself counts as the first copy. A second copy might live on an automated backup plugin sending files and database exports to cloud storage on a regular schedule. A third copy could be a manual download kept on a local computer or external drive, checked periodically to confirm it still opens correctly. No single failure, whether a hosting outage, a compromised cloud account, or a dead hard drive, can take out all three copies at once.
The two different storage media part of the rule deserves attention too. It is easy to satisfy the letter of the rule while missing its actual point. Two backups sitting on two different cloud services can still share a common failure mode. If both accounts use the same email address and password, one compromised login could take out both at once. True redundancy means different systems, different login credentials, and ideally different companies entirely standing behind each copy.
Some site owners extend this idea even further with the 3-2-1-1-0 approach. It adds a requirement that at least one copy stays offline or immutable. That copy cannot be altered or deleted, even by someone with full account access. The trailing zero refers to a goal of zero errors during a test restore. This extended version suits larger organizations more than a typical small website. Still, the underlying logic applies at any scale: more independence between copies means more real protection.
Step 6: Name and Date Your Backups Clearly
Clear, consistent file naming prevents a surprisingly common problem, restoring the wrong backup during an actual emergency. A file simply named backup.zip becomes meaningless once a folder contains a dozen similar files created over several months and years. Including the website name and the exact date in a consistent format, such as sitename-2026-09-23, solves this. It becomes immediately obvious which backup belongs to which site and when it was made.
This habit matters even more for anyone managing several websites at once. A clear naming pattern applied consistently across every site prevents an easy mix up. A backup from one site should never accidentally get restored onto a completely different one.
Step 7: Back Up Before Major Changes
Routine scheduled backups matter enormously, but they are not the only moment a backup deserves attention. Any major change carries real risk of breaking something, and creating a fresh backup immediately beforehand provides an easy way back if anything goes wrong. This applies to installing a new plugin, updating an existing one, switching themes, editing core files directly, or beginning any kind of redesign work.
A pre change backup only needs to cover the moment right before the change happens. That makes it fast to create and easy to justify, even for a small, low risk update. The few minutes spent creating this safety net are almost always shorter than the time it would take to rebuild a broken site from nothing.
Step 8: Test Your Backups
A backup that has never once been tested is really just an unverified assumption that everything will work when needed. Files can become corrupted during the backup process itself. Database exports can fail silently partway through, and storage services can occasionally deliver incomplete downloads with no obvious error message.
Testing a backup means actually attempting to restore it, ideally to a staging site or a separate test environment rather than the live website. Confirming the site loads correctly, checking that recent content appears as expected, and verifying that images and other media display properly all matter here. A backup nobody has ever tried to restore offers false confidence rather than real protection.
Many hosting providers now include a simple staging environment as part of their standard plans. That makes this kind of test far easier than it used to be. A staging site is essentially a private copy of the live website, invisible to regular visitors. Changes and restores can be tried there safely, with no risk to the version the public sees. Running a full restore test there once every few months takes only a few minutes but catches problems long before an actual emergency would.
Step 9: Set a Regular Backup Schedule
Backup frequency should roughly match how often a website actually changes, rather than following a single fixed schedule for every situation. A blog publishing new posts daily benefits from daily backups, since losing even a single day of content represents real, tangible loss. A mostly static business website that rarely changes might reasonably get by with weekly backups instead. There is simply less new material at risk between backup runs.
Most backup plugins allow this schedule to be set once and then left alone, running automatically in the background without requiring manual effort each time. Setting this schedule to match the site’s actual pace of change matters more than defaulting to whatever a plugin suggests out of the box. That keeps the routine effective and easy to maintain.
Free SEO Content Analyzer & Keyword Density Checker
How Long Should You Keep Website Backups?
Keeping every single backup ever created indefinitely eventually causes problems. A useful safety net turns into a disorganized mess that eats up storage space and makes finding the right file harder. A reasonable approach keeps recent daily backups for a couple of weeks, when the most immediate need for a quick restore typically arises.
Weekly backups can then be kept for a longer stretch, perhaps a few months. This covers situations where a problem goes unnoticed for a while before anyone catches it. A handful of older monthly or quarterly archive copies, kept indefinitely or for a year or more, provide a longer term safety net. Nobody needs every daily backup from years past taking up space.
Website Backup Mistakes to Avoid
Several recurring mistakes undermine backup strategies that otherwise look reasonable on paper. Storing every copy in a single location, even a supposedly reliable one, recreates exactly the single point of failure the 3-2-1 rule exists to prevent. Forgetting the database while backing up only files leaves a website owner holding an empty shell with no actual content inside it.
Trusting a backup plugin’s default settings without ever reviewing them is another quiet trap. Some plugins default to backing up only files, or only the database, unless a site owner manually enables the other half. A plugin installed once and never revisited might quietly stop working after a hosting change or plugin conflict. Nobody notices until a restore is actually needed.
Never testing a restore is another common mistake. It only becomes obvious at the worst possible moment, during an actual emergency when a backup turns out to be corrupted or incomplete. Assuming a web host’s automatic backups cover everything needed is another risky habit. Without checking retention periods or exactly what gets included, site owners face gaps they never knew existed until it is too late.
A Simple Website Backup Routine
A manageable backup routine does not need to be complicated to be effective. Set up an automated plugin or hosting tool to reliably back up both files and database on a schedule that matches how often the site actually changes. Send at least one copy automatically to cloud storage completely separate from the web host. Download a manual copy to a local computer every month or so as an additional layer of protection.
Test a restore at least once every few months to confirm everything still works exactly as expected. Create an extra backup immediately before any major change, whether that is a plugin update, a theme switch, or a full redesign. Clean out old, unnecessary backups periodically so storage does not fill up with duplicate files nobody will ever actually need to restore. A quarterly reminder to review the backup folder, delete anything past its usefulness, and confirm the schedule is still running keeps the whole system tidy. Following even this simple routine consistently puts a website owner in a far stronger position. Most sites currently operate with no real backup plan at all.