Professional Content Recording Made Simple: Proven Steps to Win
Essential gear for professional content recording setup.
If you’ve ever sat down with a great idea but struggled to capture it clearly, you know how frustrating recording can feel. The good news is, mastering Professional Content Recording is not just for tech experts or seasoned broadcasters. With the right mindset and tools, you can create recordings that sound sharp, polished, and engaging no matter where you’re starting from. This guide gives you ten powerful tips that work for beginners who need clear direction and advanced users who want to fine-tune their craft. Think of it as a roadmap: straightforward advice with motivation built in, so you can hit record with confidence.
This article reveals 10 powerful tips for mastering Professional Content Recording, guiding both beginners and advanced users to achieve clear, polished results.
Let’s dive into each tip and unlock your potential.
Never underestimate file organization. Keeping clean folders and labeled takes may seem boring, but it is the most underrated part of professional content recording success.
1. Choose the Right Recording Environment
Summary: Choose the right space and minimize noise for the best foundation.
Before you even press record, your environment sets the stage. Beginners should focus on basics: pick a quiet room, turn off fans, silence phones, and close windows. Even simple steps like laying down a rug or drawing curtains can cut down on distracting echoes. The first step in Professional Content Recording is learning that silence is your friend. You don’t need a fancy studio to start, but you do need to be intentional about your space.
Advanced users can take it further with acoustic panels, bass traps, or portable vocal booths. These upgrades reduce reflections and balance frequencies. If you plan to record regularly, treating your space is one of the smartest investments you can make. A great recording environment is like a blank canvas — it allows every detail of your voice or instrument to come through without interference.
2. Invest in a Reliable Microphone
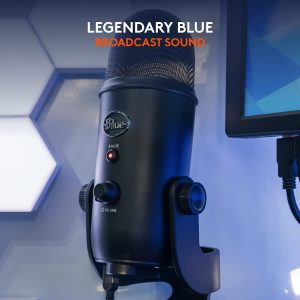
Logitech for Creators Blue Microphone Yeti USB Microphone (Blackout)
Summary: Start simple, then upgrade to advanced gear for clarity.
Your microphone is the single most important tool in Professional Content Recording. Beginners should start with a solid USB mic — something affordable, simple to use, and designed for plug-and-play recording. One of the most trusted options is the Blue Yeti, which balances price, ease, and quality. For more details, check out this resource: Blue Microphone Yeti. A good microphone immediately raises your sound quality, even if you’re just recording in your bedroom.
Advanced recorders should look toward XLR microphones with an audio interface. These setups give more control over gain, tone, and recording quality. Add accessories like a pop filter, shock mount, and boom arm, and your setup shifts from amateur to professional overnight. The right mic doesn’t just capture your voice — it builds trust with your listeners by showing you care about clarity.
3. Master Your Recording Software
Summary: Free beginner tools can grow into pro DAWs with practice.
Even the best mic can’t shine without the right software. Beginners can download free programs like Audacity or GarageBand to start experimenting. These tools are intuitive, easy to learn, and powerful enough to support your first dozen projects. The key is to get comfortable pressing record, stopping, trimming mistakes, and saving files consistently. Once you know your software, Professional Content Recording stops feeling intimidating.
Advanced users should consider Digital Audio Workstations (DAWs) like Adobe Audition, Reaper, or Logic Pro. These programs unlock multi-track editing, plug-ins, and effects chains that allow for broadcast-level polish. The deeper you go, the more creative control you gain, from compression settings to automation curves. Remember: tools are only as good as the hands using them, so commit to learning shortcuts and workflows that make recording fast and enjoyable.
4. Control Background Noise and Echo
Summary: Small fixes make a big difference, advanced tools refine further.
Background noise ruins more recordings than anything else. Beginners can solve most of it with simple fixes: move closer to your mic, turn off noisy devices, and position yourself away from windows or HVAC vents. Even a blanket draped over a door can reduce echo. Professional Content Recording always starts with removing distractions before hitting record.
Advanced creators should explore noise gates, EQ cleanup, and de-reverb tools. Many DAWs include plug-ins that automatically filter hums, clicks, and room tone. You can even measure your room response with free apps to identify problem frequencies. This technical step separates hobbyists from professionals: it ensures your audience focuses on your message, not the buzz in the background.
5. Learn Proper Mic Technique
Summary: Distance, angle, and practice elevate your sound quality.
Technique matters as much as equipment. Beginners should practice consistent mic distance — usually six to eight inches — and avoid speaking directly into the capsule to prevent harsh “P” and “B” sounds. A steady voice and natural posture go a long way. The first rule of Professional Content Recording is to respect your microphone as if it’s your audience’s ear.
Advanced users can master proximity effect, adjusting tone by moving closer or farther from the mic. Singers, podcasters, and voice actors use this skill to add warmth or emphasis. Different mics respond differently, so experiment with angles and spacing. Over time, you’ll learn to use your mic as an instrument, shaping your delivery for maximum impact.
Many famous podcasters recorded their first episodes in closets or cars. What mattered most wasn’t the gear — it was consistency.
6. Use Headphones for Monitoring
Summary: Headphones and monitors keep your sound accurate.
Monitoring is how you stay in control. Beginners should invest in closed-back headphones so they can hear every detail without sound leaking back into the mic. It’s a quick way to catch mistakes before they become part of your final track. Without headphones, Professional Content Recording becomes a guessing game — and listeners can tell.
Advanced users may add reference monitors or in-ear systems for live sessions. This setup allows you to hear mixes the way your audience will. Professional monitoring builds confidence because you know exactly how your work sounds before sharing it. The better your monitoring, the fewer surprises you’ll face in post-production.
7. Record at the Right Levels
Summary: Balanced input ensures professional quality output.
Levels are the heart of recording. Beginners should aim to keep signals in the “green” on their meters — not too soft, not too loud. Avoid clipping, which happens when audio peaks and distorts. A steady, balanced input makes editing much easier later. In Professional Content Recording, prevention is better than repair.
Advanced users should record at 24-bit depth, giving more room to adjust dynamics. Learn about LUFS (Loudness Units Full Scale) standards, especially if your recordings will go to streaming platforms or broadcast. Understanding levels gives you a professional edge and ensures your work translates well across devices and speakers.
8. Edit with Care and Precision
Summary: Simple cuts improve flow, advanced edits add polish.
Editing is where good recordings become great. Beginners should focus on trimming mistakes, adding fades, and cleaning up obvious noise. Don’t overcomplicate it. The magic of Professional Content Recording lies in presenting a clear, uninterrupted performance. Small edits go a long way in keeping listeners engaged.
Advanced editors can layer compression, EQ, and de-essers to shape tone. They may add subtle reverb or mastering effects for polish. The key is balance: editing should enhance, not distract. The best recordings feel natural, even after hours of behind-the-scenes adjustments. A polished track reflects discipline and care.
9. Organize Your Files and Workflow
Summary: Organized files and systems save time and stress.
Messy files equal wasted time. Beginners should create simple folders for each project and clearly label takes. Even if you’re only recording a short podcast or voiceover, proper organization is part of Professional Content Recording. It keeps your creative energy focused on the work, not hunting for lost files.
Advanced users can adopt version control systems, cloud backups, or collaborative platforms. Sharing projects with co-hosts, editors, or clients becomes seamless when your workflow is streamlined. Organization isn’t glamorous, but it’s the difference between feeling scattered and running a professional operation.
10. Deliver in Professional Formats
Summary: Export in formats that meet professional standards.
What you record is only half the job. Beginners should learn to export files in reliable formats like MP3 or WAV. This ensures compatibility and keeps audio quality intact. Every beginner in Professional Content Recording should make exporting correctly a habit — it saves embarrassment later.
Advanced recorders should think about bit rates, sample rates, and delivery standards. Streaming platforms, audiobooks, and video productions often have strict requirements. Meeting these specs shows professionalism and builds credibility. The final export is your handshake to the world: make sure it’s firm, confident, and clean.
Conclusion: Your Recording Journey Starts Now
Mastering Professional Content Recording isn’t about buying the fanciest gear or knowing every technical term. It’s about commitment to clarity, consistency, and care. Beginners can start small with quiet rooms and simple tools, while advanced users can refine techniques and invest in higher-end equipment. The journey is ongoing, but every step brings you closer to recordings that inspire, teach, or entertain. Remember, the most powerful recordings aren’t just technically perfect, they carry your energy and authenticity. So take these ten tips, start today, and keep improving your Professional Content Recording. Your voice deserves to be heard with confidence and clarity.
Further Reading & Resources
📖 6 ways to grow your podcast audience with SEO
📰 How to Record a Podcast Like a Pro (The Easy Way)